Tour
Hole 1


A tough starting hole, trees left and bunkers right mean a straight tee shot is a must. OOB very close over the back of the green, so don’t go too big.
gallery...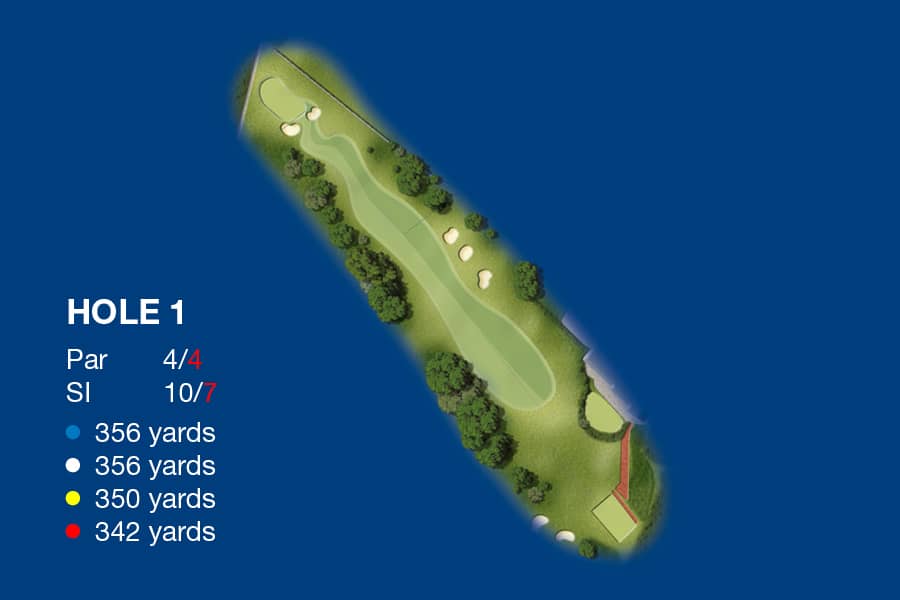
Hole 3
OOB right and trees left, hitting the fairway is essential if you are going to reach the small green in two shots.
gallery...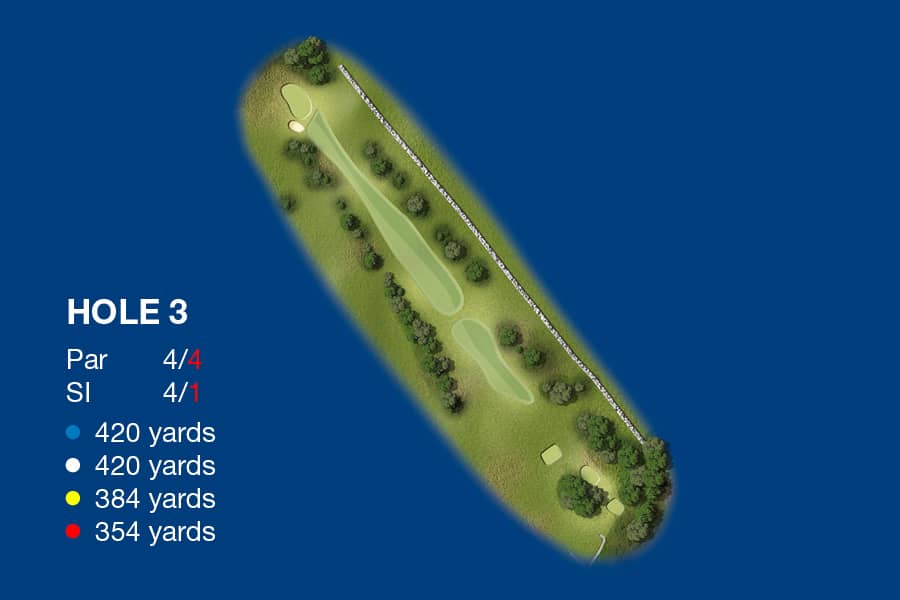
Hole 4
Driveable for the longer hitter, but a 6 or 7 is as likely as a birdie if you try. Think before you go for glory.
gallery...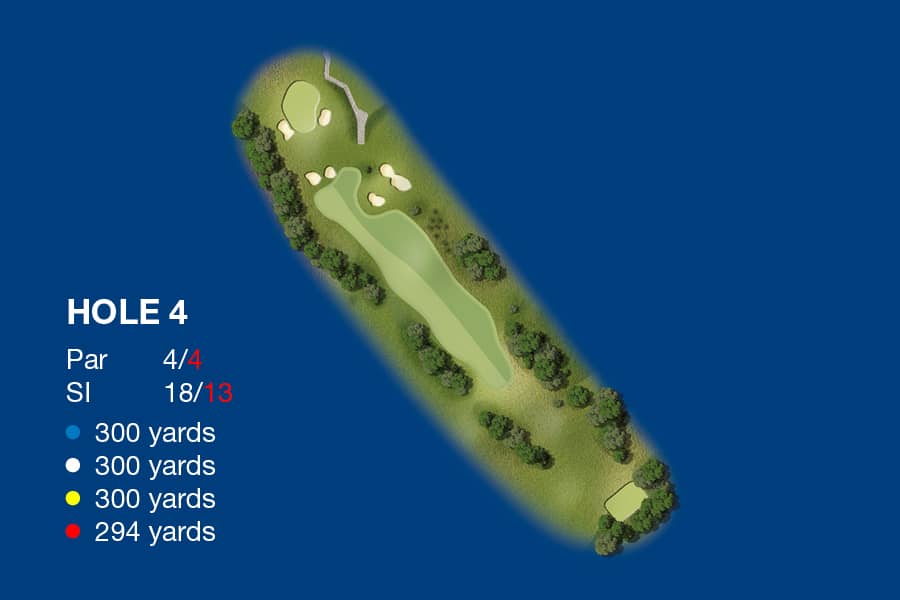
Hole 5

No room for error if you want to make Par. The safe shot is towards the front left regardless of the pin position.
gallery...
Hole 6

At 486 yards from the Blue Tee, this Par 4 sets a big challenge to make Par. Be happy with a 5 and move on.
gallery...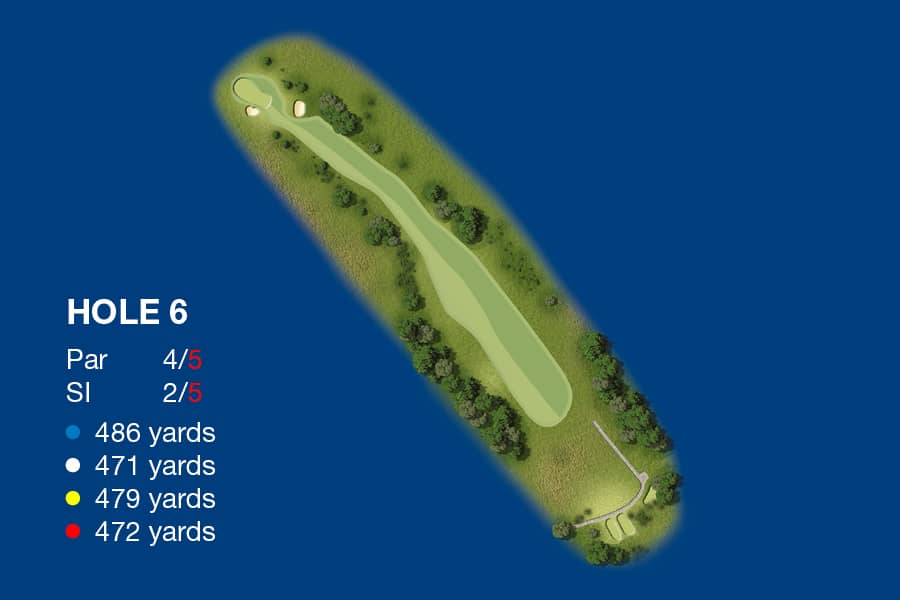
Hole 7
Into the prevailing wind this hole is usually out of reach in two shots. Lay up and get up and down if you can. Beware the green which slopes from Back to Front.
gallery...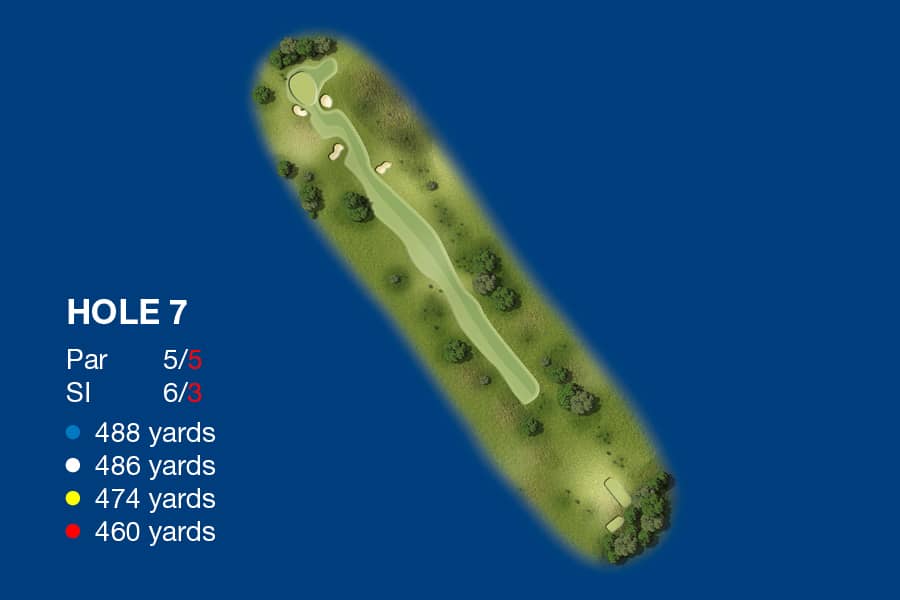
Hole 8
Trees left and right are to be avoided for your first and second shots to reach the green in regulation. Long hitters can get home in two.
gallery...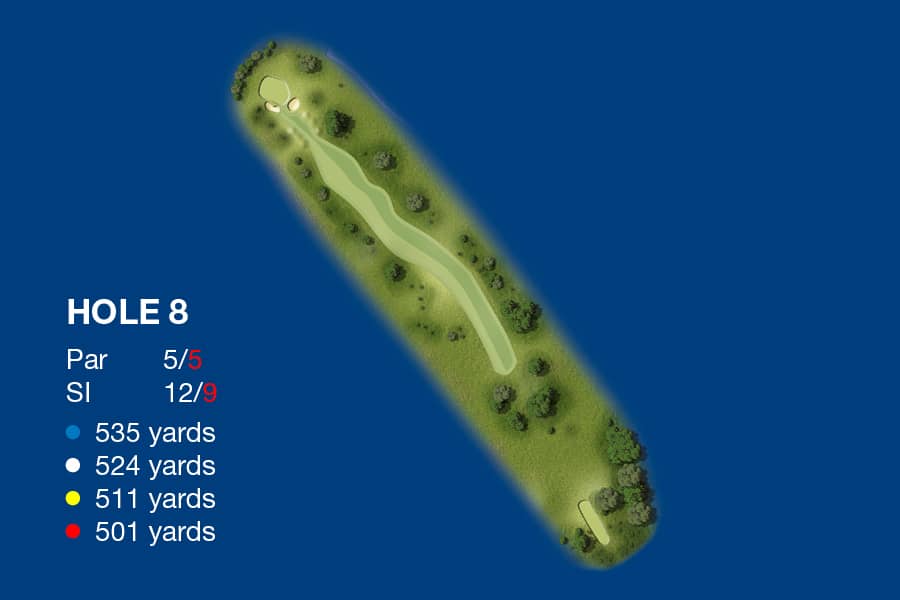
Hole 9
Tempted to ‘go for it’ you may be, but you’re safer playing to the bottom right part of the fairway which will give you site of the flag for a safe second shot and an easy Par.
gallery...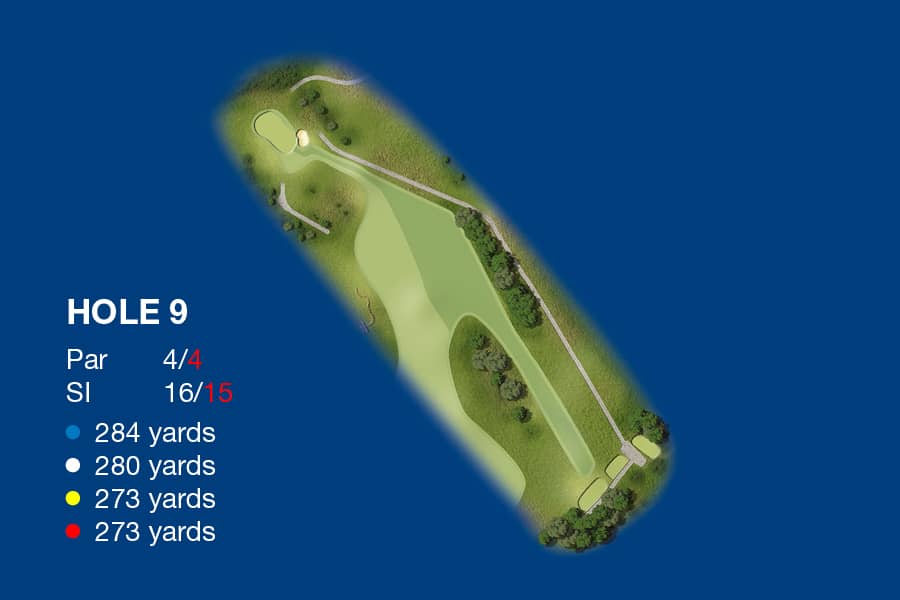
Hole 10

A great dog-leg Par 4 with the green hidden away for short tee shots. Get the distance to the corner correct and you will have a nice pitch to the green. OOB behind the green.
gallery...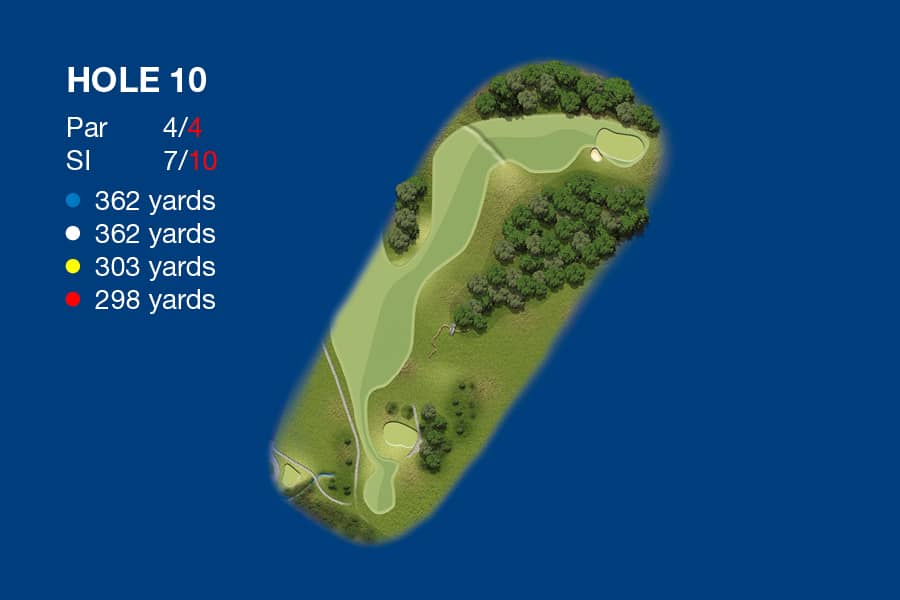
Hole 11
Even the longest hitters will find it tough to reach in two shots. The pond 60 yards short of the green will gladly swallow any miss hits.
gallery...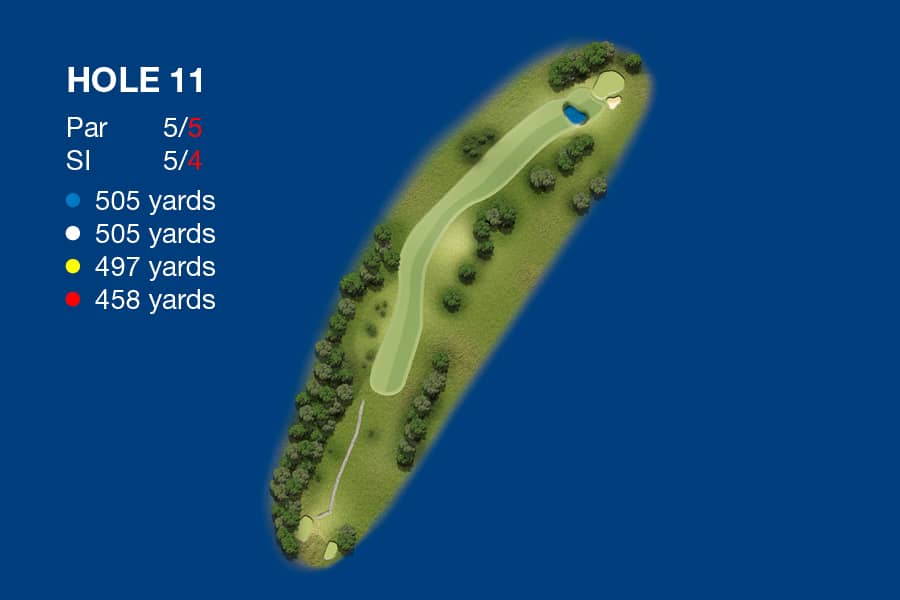
Hole 12
This tightly bunkered hole sets a tricky challenge. A well struck mid to short iron is required to hold this green.
gallery...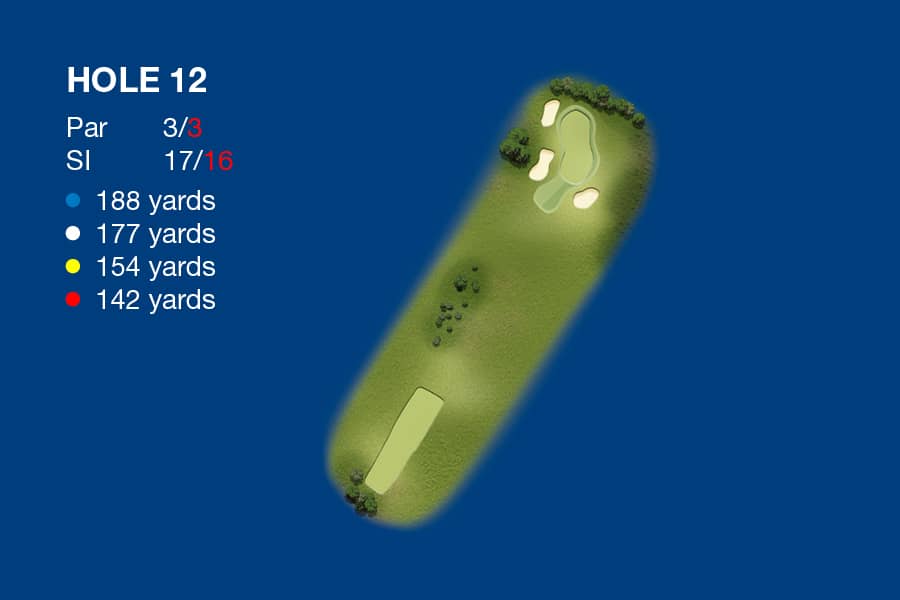
Hole 13
The sloping fairway requires a left to right tee shot flight to hold against the slope. The second shot plays longer than the yardage into the prevailing wind.
gallery...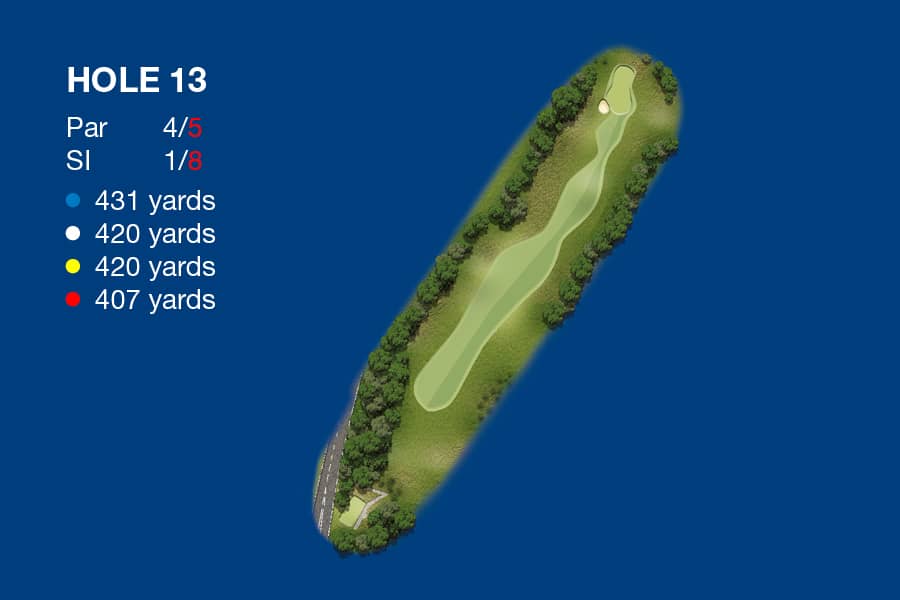
Hole 14
A good tee shot to the bottom of the hill will leave you an uphill mid iron to the green, but the tree at the bottom may block out a cautious lay-up off the tee.
gallery...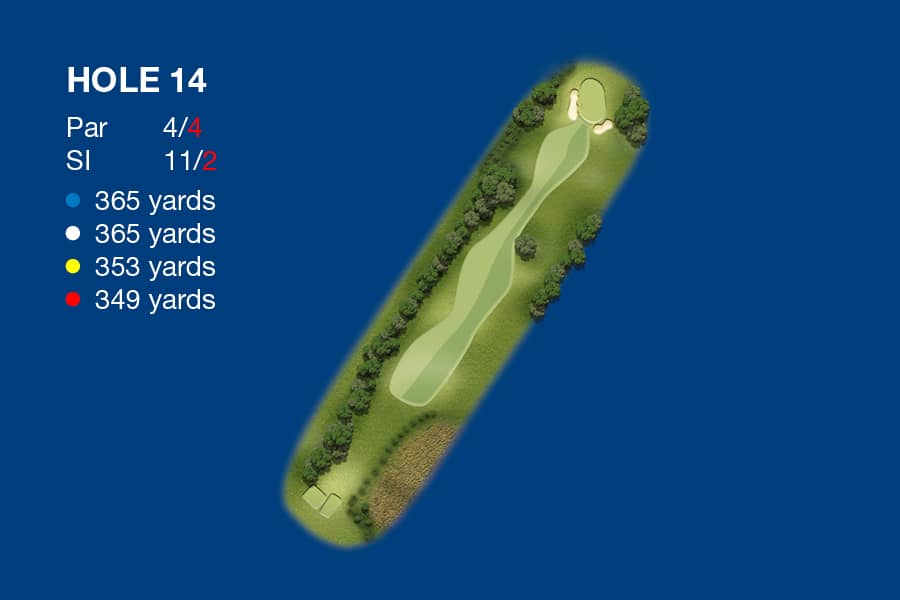
Hole 15
One of the longest Par 3 holes you may ever play. Don’t slice as the ball will be gathered by the slope and run down the hill. Miss the green and you’ll do well to get Par.
gallery...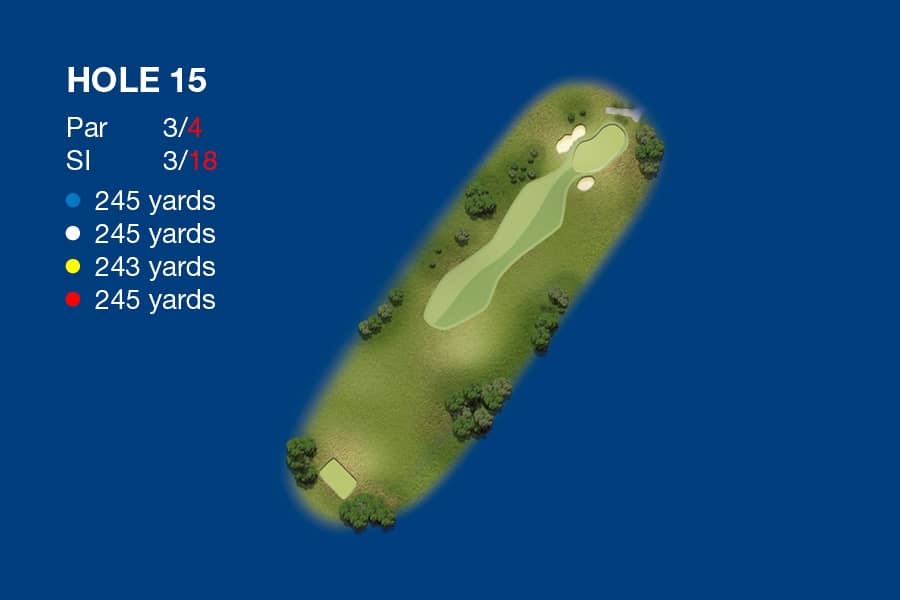
Hole 16
From the top tee, longer hitters can cut the corner over the valley to a hidden green on the left. The safe option is a lay-up for an easy pitch to the Green. A great risk-reward hole.
gallery...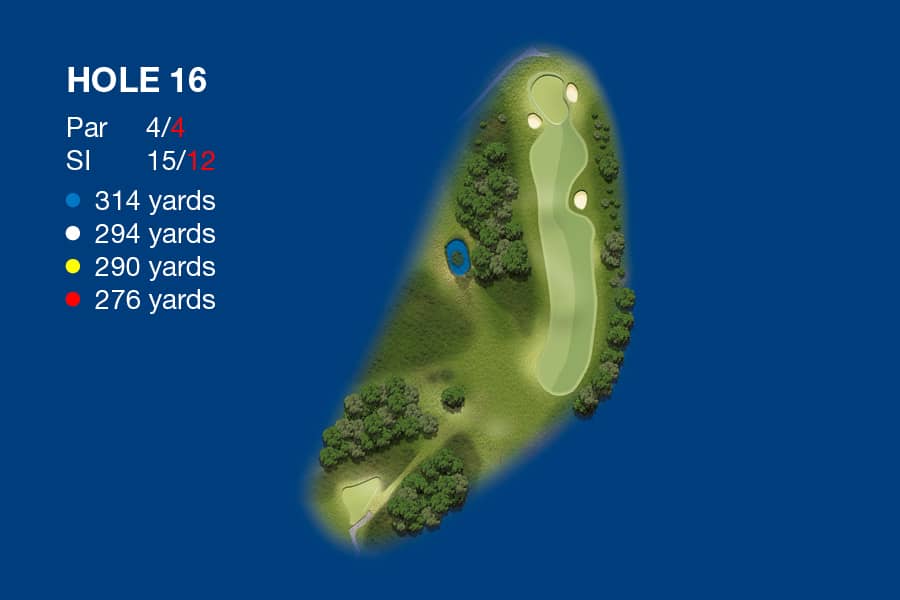
Hole 17
A tough middle-distance Par 3. A good shot is required to hit the green, but that’s when the fun begins on the course’s most undulating green.
gallery...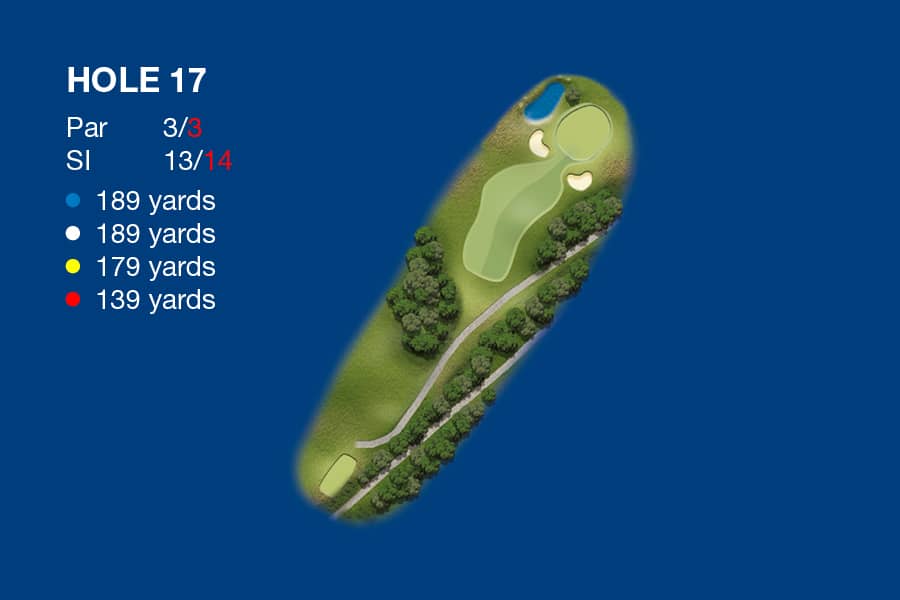
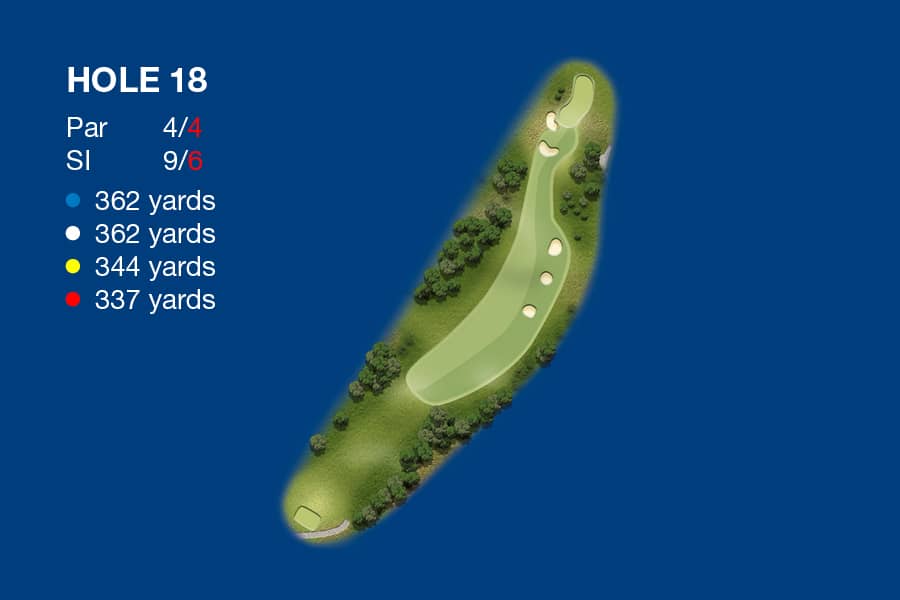
Hole 18
Like the first hole, the 18th has trees left and bunkers right. Hitting the fairway is a must for a chance to hit the long narrow green between the mounds.
gallery...